
To master low voltage output causes in a weekend, start by understanding the basics of voltage regulation and common issues like wiring faults, faulty power supplies, and voltage drops. Gather essential tools like a multimeter and perform systematic inspections of connections, terminals, and components. Quickly identify problems by measuring voltage at key points, tighten loose connections, and replace worn parts. Keep troubleshooting steps organized—if you follow this plan, you’ll uncover more insights into maintaining stable voltage throughout your system.
Key Takeaways
- Learn to identify common causes like wiring faults, power supply issues, and voltage drop points through visual inspection and multimeter testing.
- Practice troubleshooting procedures, including measuring voltage at various circuit points and inspecting connections for corrosion or looseness.
- Familiarize yourself with quick repair techniques such as tightening connections, replacing worn components, and adjusting voltage regulators.
- Implement preventive maintenance by routinely inspecting wiring, testing insulation, and monitoring voltage regulation to prevent future issues.
- Document and analyze voltage readings under different loads to understand system behavior and ensure reliable voltage output mastery.

Porch Shield Waterproof Universal Generator Cover 38 x 28 x 30 inch - for Most Generators 5500-15000 Watt, Black
- Compatible - More sizes for 5500w -15000w gas...
- Upgrade Material - Made of 600D polyester fabric...
- Tear Resistant & Waterproof - The high-level double...
As an affiliate, we earn on qualifying purchases.
Understanding the Fundamentals of Voltage Output
To understand low voltage output issues, you first need to grasp the fundamentals of voltage output itself. Voltage output is the electrical potential difference provided by a power source or circuit. Proper voltage regulation ensures that this output remains steady despite variations in load or input power. In circuit design, components are chosen to maintain consistent voltage levels, preventing fluctuations that could cause problems. Understanding how voltage regulation works helps you recognize how design choices impact output stability. For example, selecting the right voltage regulators and designing circuits with proper filtering can minimize voltage drops. Additionally, advancements in automation technologies can influence how voltage systems are monitored and managed in modern applications. By mastering these basics, you’ll be better equipped to troubleshoot and enhance systems, ensuring reliable, steady voltage output essential for ideal operation.
Porch Shield Waterproof Universal Generator Cover 32 x 24 x 24 inch - for Most Generators 5000-10000 Watt, Black
- Compatible - More sizes for 5000w -10000w gas...
- Upgrade Material - Made of 600D polyester fabric...
- Tear Resistant & Waterproof - The high-level double...
As an affiliate, we earn on qualifying purchases.
Identifying Common Causes of Low Voltage Issues
You need to recognize the typical causes behind low voltage issues to fix them effectively. Problems like wiring connection faults, a faulty power supply, or voltage drop points often lead to insufficient output. Identifying these common issues helps you target the root of the problem quickly. Utilizing monitoring tools can aid in tracking voltage levels and diagnosing issues more efficiently.
Wiring Connection Problems
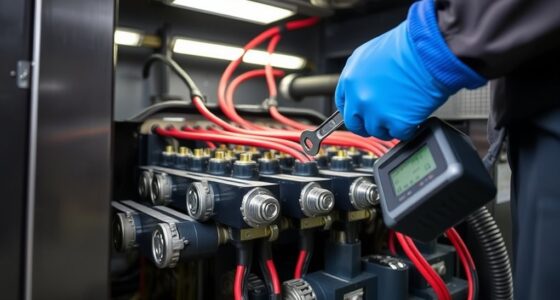
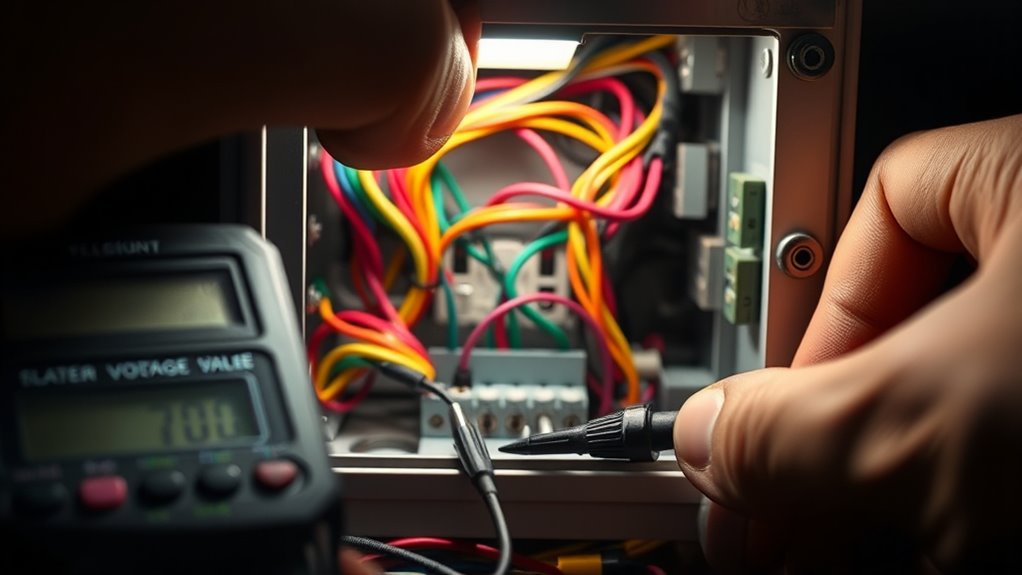
Wiring connection problems are among the most common causes of low voltage output issues. Poor grounding can create voltage drops, so guarantee all grounding connections are secure and free of corrosion. Faulty or loose wiring connections disrupt the flow of electricity, leading to reduced voltage. Check wiring insulation for damage or wear, as exposed wires can cause shorts or increased resistance. Loose terminals or connectors also hinder proper voltage transfer. Use a multimeter to test connections and confirm continuity. Address any broken, frayed, or improperly terminated wires immediately. Proper wiring practices and regular inspections help prevent these issues. By maintaining solid grounding, ensuring insulation integrity, and tightening all connections, you can considerably reduce low voltage problems caused by wiring connection faults. Additionally, understanding how voltage regulation affects overall system performance can help in diagnosing and preventing these issues effectively.
Faulty Power Supply
Faulty power supplies are a common culprit behind low voltage output issues. When you suspect this, start with power supply troubleshooting to pinpoint the problem. A failing power supply can’t maintain proper voltage regulation, leading to inconsistent or low voltage levels. Check for signs like unusual noises, overheating, or visible damage. Use a multimeter to measure output voltage; if it’s below specifications, the power supply is likely at fault. Sometimes, capacitors inside the supply may be worn out, causing voltage drops. Ensuring your power supply is functioning correctly helps eliminate it as a cause of low voltage issues. Additionally, power supply testing can help verify its reliability. Remember, addressing power supply problems promptly can prevent further damage to connected components and ensure stable operation.
Voltage Drop Points
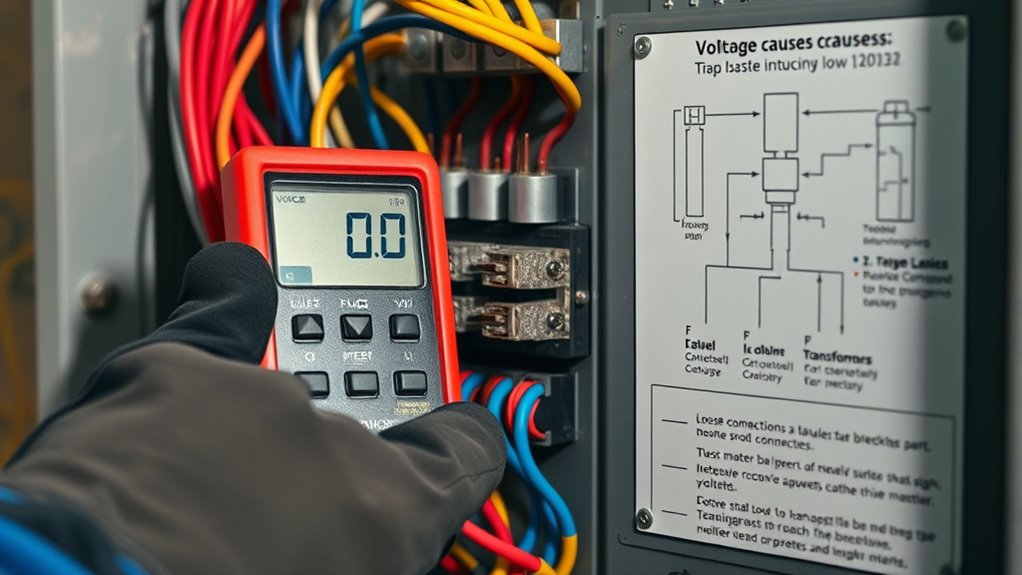
Voltage drop points are common areas where low voltage problems originate, often due to increased resistance or poor connections. These points include terminals, connectors, and junctions where wiring or components may be loose, corroded, or damaged. When a connection point isn’t secure, it creates a resistance that causes the voltage to drop along the circuit. You’ll notice this as dimming lights, sluggish motors, or inconsistent performance. To identify voltage drop issues, check connection points for corrosion, looseness, or burns. Use a multimeter to measure voltage at different points along the circuit, focusing on connection points. By pinpointing these areas, you can address the root cause of low voltage and restore proper operation quickly and effectively.

GenArmor Generator Covers While Running, 100% Waterproof Heavy Duty Tarps Generator Tent, Portable Outdoor Generator Enclosure for Most 4000w~13000w Generators, Black, Standard
- 100% Waterproof Protection: A patented innovation from GenArmor...
- Robust Integrated Design: Our unique design secures the...
- Long-lasting Durability: Weighs a hefty 14 pounds,...
As an affiliate, we earn on qualifying purchases.
Gathering Essential Tools for Troubleshooting
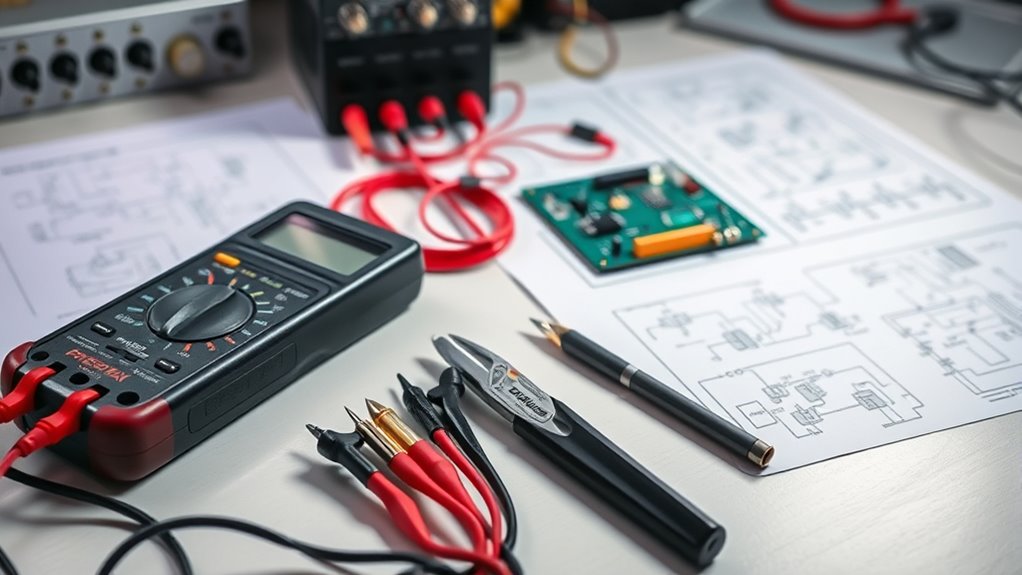
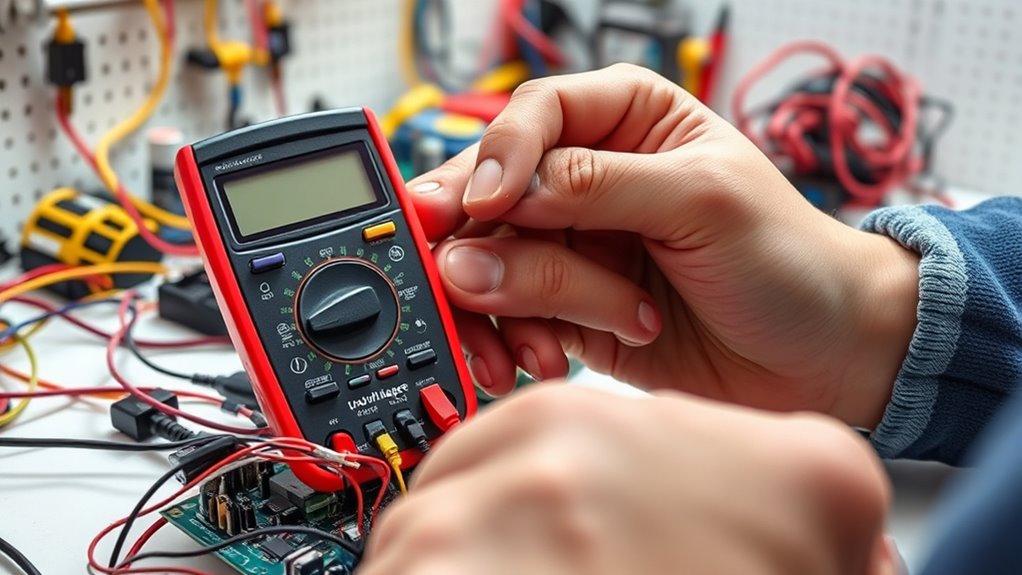
To effectively troubleshoot low voltage output issues, you need to gather the right tools beforehand. A tools overview helps you identify essential equipment like a multimeter, voltage tester, and insulated screwdrivers. These tools are crucial for accurate readings and safe handling. A multimeter allows you to measure voltage levels precisely, while a voltage tester can quickly identify problem areas. Insulated screwdrivers help you safely access connection points without risking shocks. Remember, troubleshooting tips emphasize the importance of having reliable, quality tools to avoid misdiagnoses. Preparing your toolkit in advance streamlines the process and saves time. Being equipped with the right tools means you can quickly identify whether the issue is a loose connection, faulty component, or wiring problem—key steps in mastering low voltage output troubleshooting. Additionally, understanding the benefits of high-quality tools can improve your efficiency and safety during repairs.

20kW Standby Generator with 200amp TS
- Automatically restore power in just 10 seconds with...
- Compatible to run on natural gas (18kW) or...
- Includes RXT 200-amp outdoor-rated, service entrance rated automatic...
As an affiliate, we earn on qualifying purchases.
Conducting a Step-by-Step Inspection of Your System

Once you’ve gathered your tools, start by inspecting your system step-by-step to identify potential issues. Check for voltage fluctuation at different points, noting where the voltage drops or varies unexpectedly. Examine connections and wiring for looseness, corrosion, or damage that could cause inconsistent output. Test the insulation resistance of cables and components to verify proper isolation; low insulation resistance can lead to leakage currents that reduce voltage. Look for signs of overheating or wear on connectors and terminals. Carefully observe the system’s overall condition, making note of any irregularities. Monitoring air quality indicators can also help identify issues caused by dust buildup or debris affecting system performance. This systematic approach helps you pinpoint root causes of low voltage output, whether related to wiring issues, insulation degradation, or fluctuating voltage levels, setting the stage for effective repairs.
Using Multimeters and Test Equipment Effectively
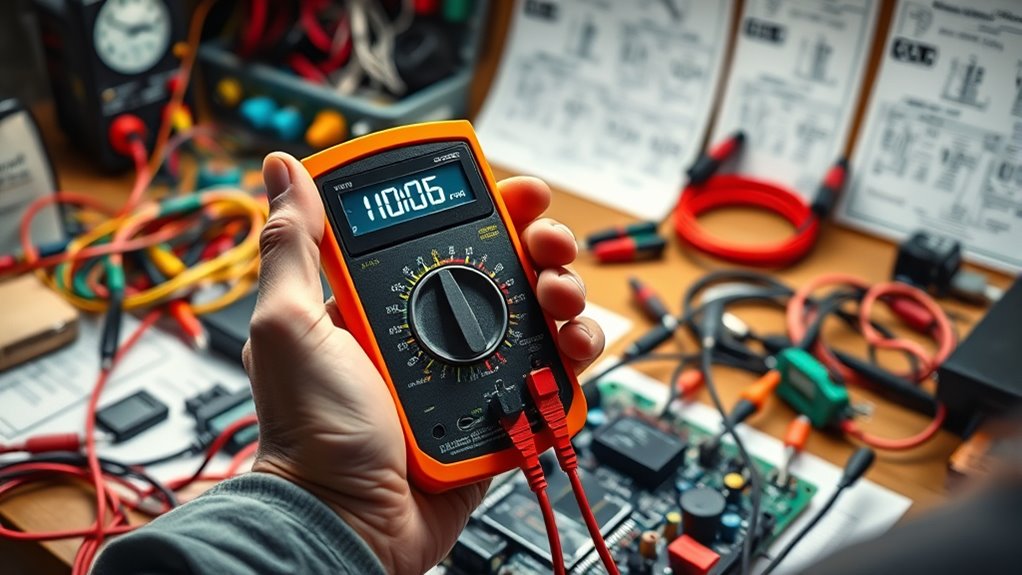
Using multimeters and test equipment effectively is essential for accurate diagnosis and troubleshooting. You need to monitor power fluctuations closely, as inconsistent voltage levels often signal underlying issues. When testing, verify your multimeter is set to the correct voltage range and make solid contacts with terminals to avoid false readings. Pay attention to load imbalances, which can cause low voltage output; measure across different points to identify uneven distribution. Use test equipment to verify if power fluctuation occurs under various load conditions. Document your readings carefully, noting any irregularities. Proper use of these tools helps you pinpoint whether the problem stems from load imbalance or other system faults, enabling targeted repairs and preventing unnecessary replacements.
Implementing Quick Fixes and Preventive Measures
When low voltage issues arise, quick repair techniques can get your system back on track fast. Regular preventive maintenance helps catch problems early and reduces downtime. By combining these approaches, you can maintain ideal performance and avoid costly repairs down the line. Paying attention to electrical system health is essential for ensuring your vehicle’s reliability.
Quick Repair Techniques
Quick repair techniques can substantially minimize downtime and prevent further damage when dealing with low voltage output issues. Start by checking voltage regulation to guarantee your system maintains proper output levels. If voltage drops unexpectedly, adjust the regulator or replace faulty components promptly. Circuit isolation is vital—locate and disconnect affected sections to prevent the problem from spreading. Use a multimeter to identify faulty wiring or damaged connectors. Tighten loose connections and replace worn-out parts immediately. Keep spare components handy for quick swaps. These steps help restore voltage levels quickly while avoiding additional risks. Remember, swift identification of voltage regulation issues and isolating problematic circuits are essential to minimize repair time and future failures. Additionally, understanding Chevrolet Tuning techniques can provide insights into optimizing electrical systems for better performance and reliability.
Preventive Maintenance Strategies
Implementing preventive maintenance strategies helps keep low voltage output issues from recurring and reduces overall downtime. Regular battery maintenance is vital; check and replace batteries before they fail to prevent voltage drops. Conduct insulation testing to identify potential leaks or faults that can cause voltage inconsistencies. Schedule routine inspections to spot worn or damaged wiring, connectors, and insulation. Keep detailed records of maintenance activities to track patterns and address recurring problems proactively. Confirm your team follows manufacturer guidelines for testing and maintenance procedures. Additionally, understanding real couple dynamics can help in managing team communication and coordination during maintenance tasks. By staying on top of battery health and insulation integrity, you minimize unexpected failures. These preventive measures not only extend equipment lifespan but also guarantee consistent low voltage output, saving you time and money in the long run.
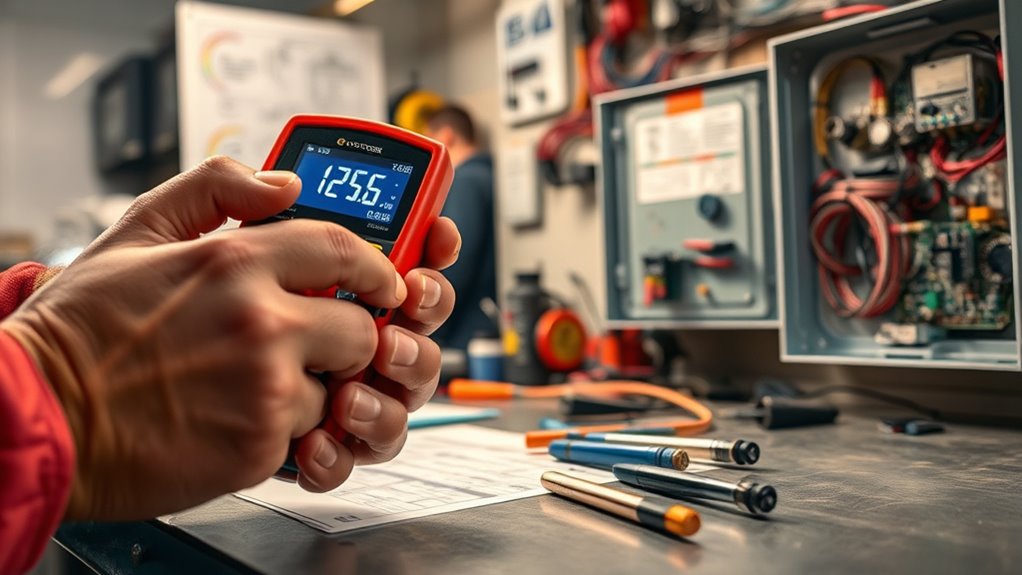
Verifying Repairs and Ensuring Reliable Performance

After completing repairs, it’s vital to verify that the low voltage output issue has truly been resolved. Begin by checking for voltage fluctuation under different load conditions to ensure stability. Use a multimeter to measure the output voltage accurately, confirming it matches the calibrated settings. Double-check output calibration to prevent future fluctuations or inconsistencies. If voltage fluctuation persists, re-evaluate your repairs and adjust components as needed. Run the system through a series of tests to simulate real-world operation, guaranteeing the voltage remains steady. Document your measurements and compare them to the desired specifications. Regularly monitoring electrical system performance can help identify potential issues early and maintain reliable operation. This process guarantees reliable performance and confirms that your troubleshooting effectively addressed the root cause of the low voltage issue.
Frequently Asked Questions
Can Environmental Factors Impact Low Voltage Output?
Environmental factors can definitely impact low voltage output. Environmental interference like electromagnetic disturbances or extreme weather causes voltage fluctuations, disrupting your system’s performance. You might notice inconsistent voltage levels or sudden drops. To troubleshoot, keep your equipment protected from environmental interference, guarantee proper grounding, and monitor voltage regularly. By understanding how environmental factors influence voltage fluctuations, you can take proactive steps to maintain stable low voltage output and prevent potential damage.
How Often Should I Perform Maintenance Checks?
You should perform maintenance checks at least once a month—think of it as your secret weapon against unexpected failures! Follow a strict maintenance schedule and inspection frequency to catch issues early. Regular checks help identify voltage drops, loose connections, or environmental impacts before they escalate. Don’t wait for problems to become emergencies—stay ahead by inspecting your system monthly, ensuring ideal low voltage output and ultimate performance.
Are There Specific Brands of Testing Equipment Recommended?
You should choose testing equipment from reputable brands like Fluke, Klein Tools, or Extech for reliable results. These brands are known for their durability, accuracy, and ease of use. When selecting testing equipment, consider your specific needs, such as multimeters or voltage testers, and opt for models that suit your skill level. Investing in quality brand recommendations guarantees precise diagnostics and helps you quickly identify low voltage output issues.
What Safety Precautions Are Essential During Troubleshooting?
When troubleshooting low voltage output, always wear personal protective equipment like insulated gloves and safety goggles to protect yourself from electrical hazards. Make sure proper grounding of equipment before testing to prevent shocks and damage. Keep your workspace dry and use insulated tools. Follow manufacturer safety instructions, and never work on live circuits. Staying cautious and prepared helps you troubleshoot effectively while minimizing risks during your weekend mastery.
How Do I Identify Intermittent Voltage Issues?
To identify intermittent voltage issues, start by monitoring for voltage fluctuation over time using a reliable multimeter. Check for wiring inconsistencies that might cause loose connections or short circuits. Pay attention to any patterns or sudden drops in voltage, and inspect connections thoroughly. Repeated testing at different times helps pinpoint the source of the problem, allowing you to address wiring or component issues effectively.
Conclusion
By understanding the fundamentals and systematically troubleshooting, you can master low voltage issues in just a weekend. Some experts believe that most problems stem from simple loose connections or faulty components, which can be quickly identified and fixed. Trust your testing tools and follow these steps carefully. With a bit of investigation and attention, you’ll not only resolve current issues but also boost your system’s reliability for the future.