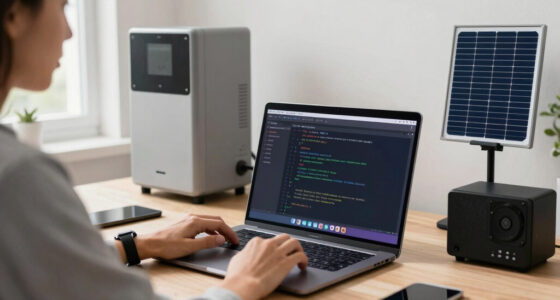
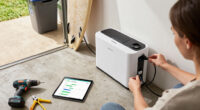
Use this guide to prepare a portable solar power bank, charge it from a wall outlet or sunlight, and use it to power a phone or other compatible device. It is for beginners who want backup power for travel, camping, or emergencies. The setup takes about 30-60 minutes, though charging from the sun can take much longer depending on the weather, panel size, and battery capacity.

Get backup power and energy gear delivered free — and shop member deals
- Fast, free delivery on millions of items
- Access to Prime Big Deal Days deals on October 6–7
- Prime Video, Amazon Music and more included

SOARAISE 48,000mAh Solar Power Bank with Wireless Charging and 4 Built-In Cables
- ✔ Battery capacity: 48,000mAh
- ✔ Battery type: Lithium-polymer
- ✔ Solar panels: 4

BLAVOR 10,000mAh Solar Power Bank with Wireless Charging
- ✔ Capacity: 10,000mAh
- ✔ Battery type: Lithium-cobalt
- ✔ USB-C output: 20W

FEELLE 50,000mAh Solar Power Bank with Magnetic Wireless Charging and Hand Crank
- ✔ Battery capacity: 50,000mAh
- ✔ Battery cell type: Lithium-polymer
- ✔ Magnetic wireless: Up to 15W
Difficulty: Beginner | Time: 30-60 minutes for initial setup; solar charging may take several hours or longer
What You’ll Need
Tools & Materials:
- Portable solar power bank
- Charging cable compatible with the power bank
- Device and its charging cable
- Wall charger, if charging from an outlet
- User manual or product label
Knowledge:
- Basic use of USB charging cables
- How to check a device’s charging indicator
Check the power bank’s label or manual for its input ports, output limits, capacity, and operating conditions. Solar charging performance varies widely. A small panel built into a power bank may be intended for emergency top-ups rather than fully charging the battery.
SOARAISE 48,000mAh Solar Power Bank with Wireless Charging and 4 Built-In Cables
The SOARAISE makes the strongest case as a shared or multi-device field charger. Its stated 48,000mAh capacity is paired with four built-in cables—USB-C, phone, USB-A, and Micro—so we can leave several loose charging leads behind. Two USB-A outputs, a USB-C input/output, and wireless charging add flexibility, and the listing says it can charge up to seven devices at once. That is more connection variety than the BLAVOR, which is capped at three simultaneous devices.Its four solar panels are appealing for camping or extended time outdoors, but they should be treated as a possible supplement: no solar input rate or recharge time is given. The same caution applies to the large capacity, since the description does not provide dimensions or weight. Compared with FEELLE, SOARAISE offers one more stated simultaneous connection and an equally substantial capacity, while FEELLE counters with a hand crank and a specified magnetic wireless feature. This is our most versatile pick when cable convenience matters more than a compact carry profile.
Pros:
- 48,000mAh stated capacity for a substantial stored-power reserve
- Four built-in cable types reduce the need to pack separate leads
- Supports up to seven devices through wired and wireless charging
- Four solar panels provide an additional outdoor charging option
Cons:
- Solar charging speed is not specified and will depend on outdoor conditions
- Size and weight are not listed, making packability difficult to assess
- USB-C output is listed at 5V/3A, with no higher-wattage fast-charge claim
Best for: Travelers or small groups carrying several phones and accessories who value integrated cables and multiple charging methods.
Not ideal for: Minimalist day hikers who need a clearly lightweight unit or buyers who need a documented solar recharge rate.
Bottom line: We recommend SOARAISE for buyers who want the most connection flexibility and a large stated reserve in one outdoor-oriented pack.
“We recommend SOARAISE for buyers who want the most connection flexibility and a large stated reserve in one outdoor-oriented pack.”
BLAVOR 10,000mAh Solar Power Bank with Wireless Charging
Where SOARAISE and FEELLE prioritize a large stored reserve, BLAVOR keeps capacity to 10,000mAh and makes a clearer case for a shorter trip or everyday bag. Its 20W USB-C output is the most specifically stated fast-charging rate in this lineup, and wireless charging lets us top up a compatible phone without reaching for a cable. It supports up to three devices at once, enough for a phone and a couple of small devices without aiming to serve a whole group.Outdoor protection is its differentiator: the listing specifies IPX5 water resistance along with dust and shock resistance, plus dual flashlights and a compass carabiner. Those details give it a more defined trail-oriented role than the larger models, whose supplied descriptions do not state an IP rating. The tradeoff is less stored power than either competitor, and the solar performance is not specified. We would choose BLAVOR for a lighter-duty outing where defined wired output and protective features matter more than maximum capacity; for multi-day use, SOARAISE or FEELLE offers a much larger stated battery.
Pros:
- 20W USB-C output is the clearest fast-charge specification in this comparison
- IPX5 water resistance plus stated dust and shock protection
- Wireless charging and support for up to three devices
- Dual flashlights and a compass carabiner add outdoor utility
Cons:
- 10,000mAh capacity is substantially below SOARAISE and FEELLE
- Solar charging speed and performance are not specified
- Recharge counts and compatibility examples are not guaranteed outcomes
Best for: Day hikers and commuters seeking a smaller-capacity power bank with a stated fast USB-C output and outdoor protection.
Not ideal for: Multi-day trips, groups, or buyers who need a large reserve or rely on solar as a quantified charging source.
Bottom line: BLAVOR is our compact-use pick for shorter outings where defined 20W USB-C charging and outdoor protection outweigh a large battery reserve.
“BLAVOR is our compact-use pick for shorter outings where defined 20W USB-C charging and outdoor protection outweigh a large battery reserve.”
FEELLE 50,000mAh Solar Power Bank with Magnetic Wireless Charging and Hand Crank
FEELLE pairs the lineup’s largest stated capacity, 50,000mAh, with the most varied backup concept: solar panels, wired charging, magnetic wireless charging, and a hand-crank generator. The crank and three-mode flashlight give it an emergency-kit angle that neither SOARAISE nor BLAVOR matches. It also lists up to six simultaneous devices, which places it between SOARAISE’s seven and BLAVOR’s three.That breadth comes with uncertainty. The description does not quantify solar or hand-crank output, so we should not treat either as a reliable way to refill a 50,000mAh battery on demand. Its USB-C output is listed as 5V/3A, while BLAVOR gives a specific 20W USB-C figure. FEELLE’s magnetic wireless charging is specified at up to 15W, but thick phone cases may reduce its grip and efficiency. Compared with SOARAISE, it trades one simultaneous connection for the crank, compass, and emergency light. It suits buyers who want multiple fallback options and accept that the most unusual ones are best viewed as contingency features.
Pros:
- Largest stated capacity in this group at 50,000mAh
- Combines wired, solar, hand-crank, and magnetic wireless charging
- Up to six devices can be charged simultaneously
- Includes a compass, three-mode flashlight, and shock- and water-resistant construction
Cons:
- Solar and hand-crank output are not quantified
- Thick phone cases can reduce magnetic charging strength and efficiency
- USB-C output is listed at 5V/3A, below BLAVOR’s stated 20W output
Best for: Emergency kit builders and campers who want a large stated capacity, magnetic wireless charging, and several backup power methods.
Not ideal for: Buyers counting on the hand crank or solar panels for predictable energy replenishment, or anyone with a thick case who depends on magnetic charging.
Bottom line: FEELLE is the most feature-rich emergency-oriented option, provided we treat its crank and solar charging as unquantified backups.
“FEELLE is the most feature-rich emergency-oriented option, provided we treat its crank and solar charging as unquantified backups.”
As an Amazon Associate we earn from qualifying purchases.
Before You Start
Inspect the power bank, ports, cables, and solar panel for cracks, swelling, corrosion, or other damage. Do not use a swollen or damaged battery. Keep the unit away from water unless its manual states a specific water-resistance rating; even then, keep ports closed or covered as directed. Do not leave it on a hot dashboard or in direct sun where the battery itself can overheat. Solar panels can face the sun while the power bank rests in a shaded, ventilated place if the cable allows.
If you plan to fly, check your airline’s current rules for spare lithium batteries and the power bank’s watt-hour rating. Airlines commonly require power banks in carry-on baggage, and limits vary by carrier and route.
Step-by-Step Instructions
Step 1: Check the power bank and its specifications
Read the manual and product label before connecting anything. Find the battery capacity, the input port used to recharge the power bank, and the output port or ports used to charge devices. Check whether the unit supports USB-C Power Delivery, a specific voltage, or a maximum output wattage. Match these details to the device you plan to charge.
Look for separate indicators for battery level, solar input, and device output. Some models use one light pattern for several functions, so check the manual instead of guessing from a blinking light.
Tip: Capacity in milliamp-hours (mAh) is usually measured at the battery’s internal voltage. Conversion losses mean a power bank will deliver less usable energy than its printed capacity suggests.
Check: You can identify the charging input, device output, battery indicator, and any stated limits for your model.
Step 2: Charge the power bank before relying on it
For the initial charge, connect the power bank’s specified input port to a compatible wall charger using the recommended cable. Place it on a firm, dry surface with airflow. Watch the battery indicator and wait until it shows a full charge according to the manual. Unplug it when charging is complete unless the manufacturer instructs otherwise.
If you do not have a wall outlet, skip to the solar charging step. Allow extra time, since sunlight and panel output change throughout the day. Do not assume that a few minutes in the sun will provide enough energy for an emergency.
Tip: Use the input port listed in the manual. A USB-C port may support input, output, or both, while some models have a separate solar input.
Check: The battery indicator shows full, or the manual’s stated full-charge signal appears. The unit remains cool or only mildly warm during charging.
Step 3: Set up solar charging
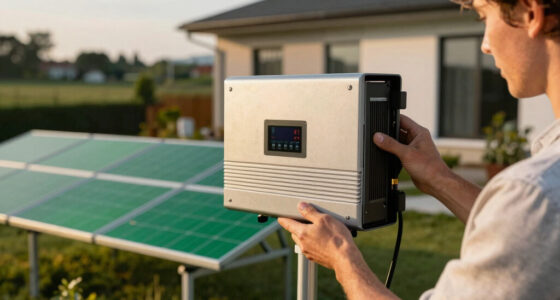
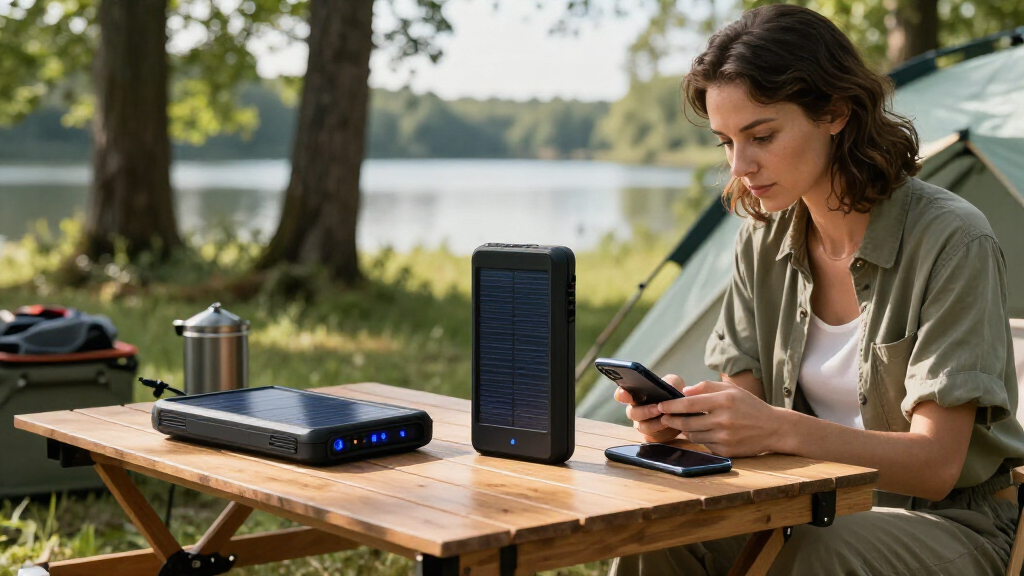
Open or unfold the solar panel as directed by the manufacturer. Connect it to the marked solar input if the panel is separate. Place the panel where it receives direct sunlight, aimed toward the sun, and adjust its angle as the sun moves. Keep leaves, fabric, and other objects from shading any part of the panel.
Position the battery in a shaded, dry, ventilated spot when possible. Check the unit’s indicator after connecting the panel to confirm that solar input has started. If your model has a built-in panel, set the panel in sunlight while keeping the unit within its permitted temperature range.
Tip: Cloud, shade, low sun, and heat can reduce charging or stop it. Follow the manual’s temperature limits, and bring the unit indoors if it becomes unusually hot.
Check: The indicator or display shows solar input or an increasing battery level. If it does not, reconnect the cable and check the panel’s position and the manual’s charging instructions.
Step 4: Connect a device to the correct output
Use a cable that fits both the power bank’s output and your device. Connect the cable to the power bank first, then connect it to the device if the manual recommends that order. Press the power button if your model requires it. Check the device screen for its charging symbol or other charging message.
For devices that need more power, use an output and cable rated for the required wattage. A power bank may charge a phone but be unable to charge a laptop, or it may charge a laptop only through a particular USB-C port. Do not force connectors or use an incompatible adapter.
Tip: Some power banks turn off when a connected device draws very little power. Check the manual for a low-current mode if you are charging earbuds, a watch, or another small device.
Check: The device shows that it is charging, and the power bank’s output indicator is active when your model has one.
Step 5: Monitor charging and manage the remaining capacity
Check the power bank and device periodically while they charge. Keep both on a stable surface and away from standing water, heavy pressure, and excessive heat. If the power bank becomes hot, disconnect the device and move the unit to a cooler, shaded place. Resume only after it has cooled and if the manual permits it.
Use the battery indicator to estimate how much charge remains. For a long trip, prioritize essential devices and recharge the power bank when a reliable outlet is available. Keep in mind that charging multiple devices at once may divide the available output or reduce total runtime, depending on the model.
Tip: A battery percentage is an estimate, not an exact measurement of how many full device charges remain. Cable losses, device use, and temperature all affect the result.
Check: The device gains charge, the power bank remains within its stated operating conditions, and you can read its remaining battery level.
Step 6: Disconnect, store, and prepare for the next use
Disconnect the device when it is charged or when you need to conserve the power bank’s remaining battery. Unplug cables by holding their connectors rather than pulling on the wires. Fold or cover the solar panel as directed, and close port covers before storing the unit.
Store the power bank in a cool, dry place away from sharp objects, direct sun, and extreme temperatures. Follow the manual’s advice for storage charge and periodic recharging. Before a trip or emergency, check the battery indicator and pack the cable you need.
Tip: Do not store a lithium battery where it can be crushed or punctured. If the casing is damaged, swollen, or leaking, stop using the unit and follow local battery disposal guidance.
Check: The device is disconnected, the power bank is undamaged, and it is stored in the condition recommended by its manufacturer.
Common Mistakes to Avoid
- Leaving the battery in intense heat while it charges. — Keep the panel in sunlight but place the battery in shade when possible. Stop charging if the unit gets unusually hot.
Troubleshooting
Problem: The battery indicator does not change or the unit gets unusually hot.
Solution: Disconnect the panel and all devices, then move the unit out of direct heat. Let it cool in a dry, ventilated place. Check the manual before trying again. Stop using it if it is swollen, damaged, leaking, or still heats abnormally.
What Success Looks Like
The power bank accepts a charge from a compatible source, its indicators respond as described in the manual, and it can deliver power through the correct output to a compatible device. The device displays a charging signal, and the power bank stays undamaged and within its stated temperature limits. Solar charging may take hours or longer, so judge it by the manufacturer’s indicators and changing battery level rather than expecting an immediate full charge.
Next Steps
Before your next trip, recharge the power bank, inspect its cables and casing, and confirm that its capacity suits the devices you plan to carry. Keep the manual or a photo of the port and indicator instructions with your gear. After use, store the unit according to the manufacturer’s guidance and check its charge periodically. Replace damaged cables, and take a damaged battery to an appropriate battery collection point.
Frequently Asked Questions
Can a portable solar power bank charge while it charges a phone?
Some models support pass-through charging, while others do not or perform poorly when charging and discharging at the same time. Check the manual. If the unit becomes hot or its battery level does not rise, disconnect the phone and charge the power bank by itself.
How long does solar charging take?
It depends on battery capacity, panel output, sunlight, shade, temperature, and the charging electronics. A small built-in panel may need many hours of strong sunlight for a partial charge. Use the manufacturer’s stated charging time as a guide and allow extra time in changing weather.
Can I leave the power bank in the sun all day?
Only if its manual permits the conditions. Solar panels need sunlight, but the battery can overheat. Keep the battery shaded and ventilated where the design allows, check it periodically, and move it if it becomes unusually hot.
How many times can it charge my phone?
Divide the power bank’s usable energy by the phone battery’s energy for a rough estimate, but expect fewer charges than the printed mAh figures may suggest. Conversion losses, phone use during charging, battery age, and cable quality affect the number.
Can I take a solar power bank on a plane?
Rules depend on the airline, route, and battery’s watt-hour rating. Check the carrier’s current rules before travel. Many airlines require spare lithium batteries and power banks to stay in carry-on baggage, and some impose capacity limits.
Fall Picks
fall essentials
As an affiliate, we earn on qualifying purchases.