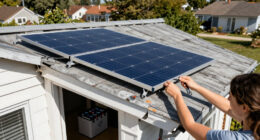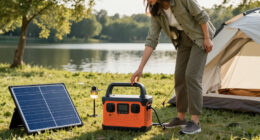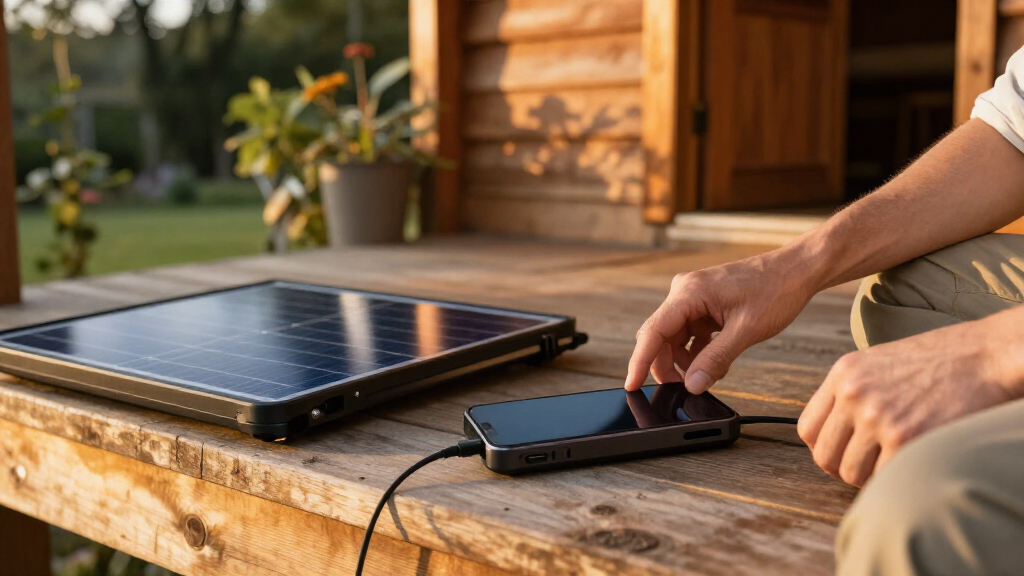

Use this guide to select and prepare a solar backup power bank, then charge a device from it. It is for beginners preparing for travel, a power outage, or outdoor use. Setup takes about 30-60 minutes; charging from sunlight can take several hours or longer depending on the battery, panel, and weather.

Get backup power and energy gear delivered free with Prime
- Fast, free delivery on millions of items
- Prime Video, Amazon Music and more included
- Member-only deals all year

SolarTred 20,000mAh Solar Power Bank with 4 Panels and 3 Built-In Cables
- ✔ Capacity: 20,000mAh
- ✔ Battery type: Lithium polymer
- ✔ Solar panels: 4 integrated panels

BLAVOR 20,000mAh Solar Power Bank with Wireless Charging
- ✔ Capacity: 20,000mAh
- ✔ Built-in cables: 4: 2 USB-C, 1 iOS, 1 USB-A
- ✔ Ports: 3

BLAVOR 10,000mAh Solar Power Bank with 20W USB-C and Wireless Charging
- ✔ Capacity: 10,000mAh
- ✔ Battery type: Lithium-cobalt
- ✔ USB-C output: 20W
Difficulty: Beginner | Time: 30-60 minutes for setup; several hours or longer for solar charging
What You’ll Need
Tools & Materials:
- Solar power bank with a built-in or compatible solar panel
- USB charging cable that fits your device
- Device manual or its charging specifications
- Optional wall charger and cable for faster initial charging
Knowledge:
- Basic familiarity with USB cables and device charging
- Ability to read the power bank’s labels or product manual
Check the manufacturer’s instructions for charging limits, water resistance, operating temperatures, and supported devices. A small panel on a power bank often works best as an emergency top-up source; it may take a long time to recharge the bank fully. Keep the unit dry unless its documentation specifically permits exposure to water.
SolarTred 20,000mAh Solar Power Bank with 4 Panels and 3 Built-In Cables
For a general-purpose outdoor backup bank, the SolarTred M5WS puts the most important pieces together: 20,000mAh of stated capacity, four integrated solar panels, multiple connection options, and an IP67-rated housing. That combination gives it an edge over the compact BLAVOR when we want more stored capacity and a stronger stated water-and-dust rating. Three built-in cables also reduce the need to pack separate leads, while USB-C and USB-A ports provide extra connection choices.The SolarTred’s broad feature set comes with a real size tradeoff: at 1.4 pounds, it is substantially heavier than the 9.3-ounce BLAVOR 10,000mAh. Its solar setup is appealing, but the listing gives no recharge rate, so we would charge it fully before a trip instead of counting on panels to refill it quickly. The flashlight and camping light also cannot run at once, a small but relevant limitation when we want lighting and signaling at the same time. Compared with BLAVOR’s larger model, SolarTred offers a clearer IP rating, while BLAVOR adds Qi wireless charging and a compass.
Pros:
- 20,000mAh stated capacity for a larger reserve than the compact BLAVOR.
- Four integrated solar panels, alongside USB charging options.
- Three built-in cables plus USB-C and USB-A ports.
- IP67 housing and separate flashlight and camping-light functions.
Cons:
- At 1.4 pounds, it is the heaviest choice in this roundup.
- Solar charging performance is not specified.
- Flashlight and camping light cannot operate simultaneously.
Best for: Campers and outage planners who want a high-capacity bank with a stated IP67 rating and several built-in charging leads.
Not ideal for: Ultralight travelers, or anyone who needs documented solar recharge times or simultaneous use of both built-in lights.
Bottom line: We recommend the SolarTred as the best-balanced rugged backup here, provided its weight suits your kit and you plan to recharge it from a dependable source.
“We recommend the SolarTred as the best-balanced rugged backup here, provided its weight suits your kit and you plan to recharge it from a dependable source.”
BLAVOR 20,000mAh Solar Power Bank with Wireless Charging
When a group carries a mix of phones and cables, the BLAVOR 20,000mAh is the most connection-focused option in this lineup. Its four built-in cables, three ports, and Qi wireless charging cover more charging situations than the SolarTred’s listed connections, and its 20,000mAh capacity matches the SolarTred. A compass and thermometer add outdoor-oriented extras, giving this model a different emphasis: convenience and built-in utility rather than the clearest ruggedness specification.That convenience is tempered by an output discrepancy in the supplied details: USB-C fast charging is specified as 20W, while maximum output is listed as 18W. We would verify which figure applies to the intended charging mode before relying on it for a particular device. The description calls its protection waterproof, shockproof, and dustproof, but it gives no IP rating to compare directly with SolarTred’s IP67 or the smaller BLAVOR’s IPX5. Solar charging speed is also unspecified. Choose this model when wireless charging and integrated cables matter more than a clearly stated protection grade; skip it if precise output or ingress ratings are essential to your decision.
Pros:
- 20,000mAh capacity, matching the SolarTred’s reserve.
- Four built-in cables, three ports, and Qi wireless charging.
- USB-C fast charging is specified at 20W.
- Includes flashlight, camping light, compass, and thermometer.
Cons:
- The listed 18W maximum output conflicts with the stated 20W USB-C fast charging.
- No IP rating or solar charging rate is provided in the supplied details.
- Its 1.5-inch thickness may take more bag space than the compact BLAVOR.
Best for: Travelers or campers carrying several compatible devices who value built-in cables, Qi wireless charging, and outdoor accessories in a high-capacity bank.
Not ideal for: Buyers who need a single unambiguous maximum-output figure, a stated IP rating, or documented solar input performance.
Bottom line: We would choose this BLAVOR over the SolarTred when charging flexibility and wireless convenience matter more than a clearly stated ruggedness rating.
“We would choose this BLAVOR over the SolarTred when charging flexibility and wireless convenience matter more than a clearly stated ruggedness rating.”
BLAVOR 10,000mAh Solar Power Bank with 20W USB-C and Wireless Charging
The smaller BLAVOR makes the most sense when carrying less matters more than keeping the biggest reserve on hand. At 9.3 ounces, it weighs far less than the SolarTred, while still offering Qi wireless charging, three-device charging, and a specified 20W USB-C output. Its IPX5 rating gives us a defined protection claim, unlike the larger BLAVOR’s unspecified protection grade, though it is a different and less comprehensive claim than SolarTred’s IP67 rating.Capacity is the decisive compromise: 10,000mAh is half the stated capacity of either 20,000mAh option, so we would favor it for a compact day kit or as backup for fewer devices rather than a longer group outing. The listing estimates a seven-hour battery recharge time, so replenishing it still takes planning. Its solar charging rate is not supplied, and the IPX5 rating should not be read as a promise of protection beyond the stated water-resistance claim. Compared with the larger BLAVOR, this model gives up capacity and the extra built-in cable count; compared with SolarTred, it is easier to carry and offers a longer stated warranty.
Pros:
- 9.3-ounce weight is the lowest in this roundup.
- Qi wireless charging and stated 20W USB-C output.
- Can charge up to three devices simultaneously.
- IPX5-rated case and 3-year warranty.
Cons:
- 10,000mAh capacity is half that of the other two banks.
- Listed battery recharge time is about 7 hours.
- No solar charging speed or performance figure is supplied.
Best for: Day hikers and travelers who want a lighter personal backup bank with wireless charging and a specified 20W USB-C output.
Not ideal for: People who need a large shared reserve, extended off-grid power, or a solar recharge rate they can plan around.
Bottom line: We would pick the compact BLAVOR for lighter personal carry, but choose either 20,000mAh model when a larger backup reserve matters more.
“We would pick the compact BLAVOR for lighter personal carry, but choose either 20,000mAh model when a larger backup reserve matters more.”
As an Amazon Associate we earn from qualifying purchases.
Before You Start
Inspect the power bank, panel, ports, and cables for damage. Do not use a swollen, cracked, unusually hot, or leaking battery. Look at the capacity rating in watt-hours (Wh) or milliamp-hours (mAh), plus the USB output voltage and current. If capacity is listed in mAh, it is usually measured at the battery’s internal voltage, so the energy delivered to a device will be lower after conversion losses. Do not assume the number equals the amount your phone will receive.
Separate the two tasks: charging the power bank and charging a device from it. Unless the manufacturer supports pass-through charging, avoid charging the bank from sunlight while it powers another device. This can add heat and may reduce charging efficiency.
Step-by-Step Instructions
Step 1: Check the power bank’s capacity and outputs
Read the label or manual and note the battery capacity, USB output ports, maximum output, supported input methods, and any charging indicators. Confirm that the output port and cable match the device you plan to charge. For a laptop or other high-power device, check that the power bank supports the required voltage and wattage; a standard USB phone power bank may not.
Tip: Capacity ratings describe stored energy, not a guaranteed number of full device charges. Conversion losses, cable quality, battery age, and the device’s power use affect the result.
Check: You can identify a supported output for your device and know which indicator shows the power bank’s charge level.
Step 2: Charge the bank before relying on sunlight
Connect the bank to a compatible charger and cable if the manufacturer provides a wall-charging method. Place it on a stable, dry, ventilated surface away from direct heat. Follow the manual’s charging time and indicator instructions, and disconnect it when the bank reports a full charge or reaches the specified limit.
Tip: For a first outing or emergency kit, charge by wall power ahead of time when available. The small solar panel on many power banks is intended to extend runtime or provide a slow emergency charge, not replace a wall charger.
Check: The charge indicator shows the level specified by the manufacturer, and the case remains at a normal temperature with no warning lights or unusual odor.
Step 3: Position the panel for sunlight
Expose or unfold the panel as the manual directs. Place it in steady, unobstructed sunlight and angle it toward the sun. Keep the panel clear of shade from branches, bags, or your body. If the panel is separate, connect it only to the input port and with the cable or adapter specified by its maker.
Tip: Move the panel as the sun shifts, and check the charging indicator after positioning it. Window glass, clouds, shade, and indoor light can sharply reduce solar output.
Check: The bank displays its solar-input or charging indicator. If it does not, recheck the connection, sunlight, and instructions before leaving it in place.
Step 4: Allow time for solar charging
Leave the bank in sunlight for the time needed to gain the charge you require, checking its level periodically. Use the manufacturer’s estimate if available. Solar charging time varies with panel size, sun angle, temperature, shade, and the bank’s capacity; a full recharge may take many hours or may not be practical from a compact built-in panel.
Tip: Do not cover the unit or leave it on a hot dashboard. If the case becomes unusually hot, move it to a cooler location and follow the manufacturer’s safety instructions.
Check: The displayed charge level rises over time. If it stays unchanged, adjust the panel’s position or check the connection and input requirements.
Step 5: Connect one compatible device
Connect your device to the matching output port with a sound cable. Turn on the power bank if its design requires it, then check the device’s charging symbol or battery status. Start with one device so you can confirm that the port and cable work before adding any other load.
Tip: Some power banks turn off automatically when a device draws very little power. If charging stops, check the manual for a low-current or trickle-charge mode instead of repeatedly reconnecting the cable.
Check: Your device shows that it is receiving power, and the power bank’s output indicator remains on as expected.
Step 6: Monitor charging and disconnect safely
Check the device and power bank periodically. Disconnect the device when it reaches the level you need or when the bank is nearly depleted. Unplug by holding the connector rather than pulling the cable. Store the bank in a cool, dry place and protect the panel from scratches.
Tip: Stop using the bank if it becomes unusually hot, smells odd, swells, or shows physical damage. Follow the maker’s guidance for service and battery recycling.
Check: The device gained charge, the bank shows a lower remaining level, and neither unit shows damage or unusual heat.
Common Mistakes to Avoid
- Expecting a compact panel to recharge the bank quickly or completely. — Charge the bank from a compatible wall charger before planned use, and treat solar input as a slow top-up unless the product specifications state otherwise.
- Leaving the panel partly shaded or behind a window. — Place it in direct, unobstructed sunlight, adjust its angle, and confirm that the charging indicator appears.
- Connecting a device that needs more power than the bank can supply. — Compare the device’s required voltage and wattage with the bank’s output ratings before connecting it.
- Leaving the bank in intense heat or charging it while wet. — Follow the rated temperature and water-resistance limits, keep it ventilated and dry, and move it out of heat if it becomes unusually warm.
Troubleshooting
Problem: The power bank does not show solar charging.
Solution:
Check that the panel is connected to the correct input, the connector is fully seated, and the panel is in direct sunlight. Remove shade and try another angle. Confirm that the bank accepts solar input through that port and that the panel meets its input requirements.
Problem: The charge level barely rises in sunlight.
Solution:
Improve the sun angle, move the panel away from shade or glass, and allow more time. Cloud cover, weak winter sun, high temperatures, and a small panel can all slow charging. Use a compatible wall charger when a faster recharge is needed.
Problem: The device does not charge when connected.
Solution:
Check the cable, output port, and power bank’s on/off instructions. Try a supported port or a known-good cable, then confirm the device accepts the port’s output. If the bank is empty, recharge it before trying again.
Problem: Charging stops before the device is full.
Solution:
Check the bank’s remaining capacity and whether it shuts off at low current. Recharge the bank and reconnect the device; for a low-power device, use the maker’s trickle-charge mode if available. A worn battery or incompatible output may need replacement or support from the manufacturer.
What Success Looks Like
The bank accepts charge using a supported method, its indicator responds as described in the manual, and a compatible device displays active charging. After use, the device’s battery level has increased and the bank’s remaining charge has decreased. The power bank and device remain free of unusual heat, swelling, odor, or damage.
Next Steps
Recharge the bank after use and check its charge level before each trip or expected outage. Store it within the temperature range in its manual, inspect cables and ports periodically, and follow the manufacturer’s guidance for long-term storage. If the bank will sit unused for months, check whether the maker recommends a partial charge and schedule for topping it up. Recycle a worn or damaged battery through an appropriate battery collection service.
Frequently Asked Questions
Can a solar backup power bank charge fully from its built-in panel?
Sometimes, but it may take many hours of strong sunlight. Check the panel’s rated output and the manufacturer’s charging estimate. Many compact panels are designed for emergency top-ups rather than routine full recharging.
Can I use the power bank while it is charging from sunlight?
Only if the manufacturer supports pass-through charging. Otherwise, charge the bank first, then connect your device. Simultaneous charging can create heat and may lower performance.
How do I know if the bank can charge my laptop?
Check the laptop’s required voltage and wattage, then compare them with the bank’s output specifications. Many phone-focused banks cannot supply enough power. Use a bank and cable rated for the laptop’s charging standard.
Will it charge on a cloudy day?
It may receive some solar input, but charging will usually be slower and can vary greatly. Watch the bank’s indicator and use a compatible wall charger when you need a predictable charge.