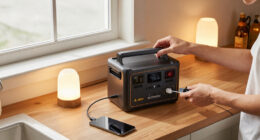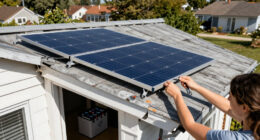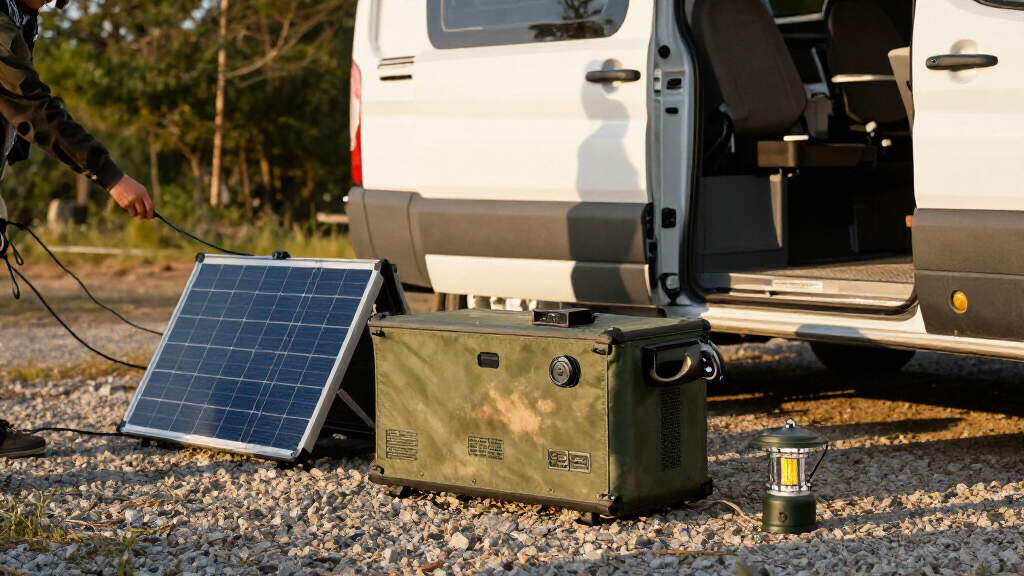
Use this guide to plan a portable solar power station setup, connect compatible equipment, charge the battery, and run devices within the station’s limits. It is for beginners preparing for camping, outages, or other off-grid use. Allow 1-2 hours to review your power needs and set up; a full charge can take longer depending on the battery, panel, and sunlight.

Get backup power and energy gear delivered free with Prime
- Fast, free delivery on millions of items
- Prime Video, Amazon Music and more included
- Member-only deals all year

Anker SOLIX C300 Portable Power Station with 60W Solar Panel
- ✔ Battery capacity: 288Wh
- ✔ Battery chemistry: LiFePO4
- ✔ Rated output: 300W

Jackery Explorer 300 Portable Power Station
- ✔ Battery capacity: 292Wh
- ✔ Rated output: 300W
- ✔ Peak surge: 600W

ZeroKor 300W Portable Power Station with 60W Solar Panel
- ✔ Battery capacity: 280Wh
- ✔ Rated maximum output: 300W
- ✔ Weight: 5.1 lb
Difficulty: Beginner | Time: 1-2 hours for planning and initial setup; charging time varies
What You’ll Need
Tools & Materials:
- Portable power station with its manual
- Compatible solar panel and the correct cable, if solar charging is planned
- List of devices you intend to power
- Device chargers and cables
- Optional: device watt meter or manufacturer power specifications
Knowledge:
- Basic ability to read product labels and connect cables
- Understanding that watts measure power and watt-hours measure stored energy
Check the station’s input and output ratings, supported voltage, connector type, and operating temperature range before buying or connecting accessories. Solar panels and stations can use different connectors even when their electrical ratings appear compatible. Follow the station and panel manuals if their instructions differ from general guidance.
Anker SOLIX C300 Portable Power Station with 60W Solar Panel
The Anker SOLIX C300 is the strongest all-around match for buyers who want a portable station and a panel in one purchase. Its 288Wh LiFePO4 battery and 300W rated output are in the same small-capacity class as the Jackery and ZeroKor, but Anker adds three AC outlets and multiple USB-C options. The 140W two-way USB-C ports are particularly useful for newer laptops and fast-charging devices, while the Jackery’s USB-C output is rated at 100W.At 15.5 pounds, it is substantially heavier than the listed 7.5-pound Jackery and 5.1-pound ZeroKor. That makes it better for car camping, a base camp, or an emergency kit than carrying far from a vehicle. The included 60W solar panel adds convenience, but its small rating means solar replenishment will take patience; buyers seeking quicker recovery should consider what larger compatible panels can be used, noting the listed compatibility restrictions. The bundle is also shipped in separate packages, so the station and panel may arrive at different times.For most buyers, Anker’s advantage is the combination of durable battery chemistry, charging versatility, and a panel in the box. It costs in portability compared with the lighter alternatives, and 288Wh is still limited for appliances or extended outages. We would choose it for charging several personal devices around camp, not for running a fridge or other substantial load for long periods.
Pros:
- 288Wh capacity and 300W rated output in a compact station format
- LiFePO4 battery rated for 3,000 cycles
- Eight charging ports, including two 140W USB-C ports
- 60W solar panel and charging cables included
Cons:
- At 15.5 pounds, it is much heavier than the Jackery and ZeroKor listed here
- The included 60W panel is a modest source for replenishing the battery
- Panel compatibility is restricted; the listed Anker PS30, PS200, and PS400 are not supported
Best for: Car campers and emergency-kit buyers who want a current LiFePO4 station, several device ports, and an included solar panel.
Not ideal for: Hikers prioritizing the lightest possible kit, or anyone expecting to power high-wattage appliances or recharge quickly from the small included panel.
Bottom line: We recommend the C300 for buyers who value a complete, flexible solar-ready kit more than minimum carry weight.
“We recommend the C300 for buyers who value a complete, flexible solar-ready kit more than minimum carry weight.”
Jackery Explorer 300 Portable Power Station
For trips where every pound matters, the Jackery Explorer 300 is the easiest station in this group to carry. It weighs 7.5 pounds while storing 292Wh, slightly more stated capacity than the Anker SOLIX C300’s 288Wh. Its integrated handle and 300W rated output suit a mix of phones, cameras, drones, and laptops, though buyers should compare device wattage against the station’s limit before packing.Its main compromise is the solar setup: the panel is not included. Jackery describes charging with its own panels, including an approximate 80% charge in 2.8 hours with a 100W panel under suitable conditions. That panel is more powerful than the 60W units bundled with Anker and ZeroKor, but it is an additional piece to select and carry. The Explorer also has fewer listed ports than Anker’s eight: two AC outlets, USB-C, two USB-A, and a car port.The product details identify a LiFePO4 battery rated for over 4,000 cycles, but also list the cell type as lithium ion. We would verify the exact model’s battery specification before buying if chemistry is central to the decision. Even with that uncertainty, the low weight and near-300Wh capacity make it a sensible choice for mobile users who already own compatible solar panels. Buyers starting from scratch may prefer Anker’s ready-to-use bundle.
Pros:
- Lightest listed unit at 7.5 pounds
- 292Wh capacity, slightly above the Anker C300’s 288Wh
- 300W rated output with 600W peak surge
- Solar charging option with a 100W panel, which is not included
Cons:
- Solar panel is sold separately
- Six listed device ports, fewer than the Anker’s eight
- Product details give inconsistent battery chemistry descriptions
Best for: Travelers and campers who need a light 300W station and already have compatible Jackery solar panels or plan to choose a panel separately.
Not ideal for: Buyers seeking a ready-to-go solar bundle, or those who need the broadest range of charging ports and confirmed battery specifications.
Bottom line: We would pick the Explorer 300 when carry weight matters most and adding a separate solar panel fits our plans.
“We would pick the Explorer 300 when carry weight matters most and adding a separate solar panel fits our plans.”
ZeroKor 300W Portable Power Station with 60W Solar Panel
The ZeroKor 300W is the lightest listed option at 5.1 pounds, and its 60W panel comes in the box. That makes it appealing for short camping trips where we want a small station for phones, tablets, headphones, and similar low-demand gear without assembling a separate solar kit. Compared with the Jackery, it includes the panel and weighs less; compared with the Anker, it is far easier to carry but has less clearly documented battery longevity and fewer listed USB-C details.The station is specified at 280Wh and 300W maximum output, with two AC outlets and a mix of DC and USB ports. That is enough capacity for lightweight electronics, but the manufacturer warns that loads above 300W can make the unit unavailable and specifically cautions against devices such as coffee makers, hair dryers, and water pumps. The 60W panel can also charge small devices directly, although its junction box is not waterproof and needs to stay dry.ZeroKor’s bundle is the easiest entry point for buyers who value low weight and an included panel, but the product information is less reassuringly specific than Anker’s on battery chemistry, cycle life, and charging performance. The manual also advises regular charging and avoiding complete depletion, which may not suit someone wanting a station to sit untouched as an emergency-only backup. We see it as a small-device camping kit, not a versatile appliance source or a long-term backup battery.
Pros:
- Lightest listed station at 5.1 pounds
- 60W solar panel included
- 280Wh battery with 300W maximum output
- Multiple AC, DC, and USB charging options
Cons:
- The 300W ceiling excludes many heat-producing and motorized appliances
- Battery chemistry and cycle-life details are not provided in the listing
- The panel junction box is not waterproof, and the manual advises ongoing battery maintenance
Best for: Occasional campers who want a very light, panel-included package for phones, tablets, and other small electronics.
Not ideal for: Buyers needing transparent battery-life specifications, high-wattage appliance support, weatherproof panel hardware, or a set-and-forget emergency reserve.
Bottom line: We would choose ZeroKor for the lightest bundled kit and small electronics, while accepting less detailed battery information and tight load limits.
“We would choose ZeroKor for the lightest bundled kit and small electronics, while accepting less detailed battery information and tight load limits.”
As an Amazon Associate we earn from qualifying purchases.
Before You Start
Use the station on a dry, stable surface with ventilation around its cooling vents. Keep the battery and connections away from rain, standing water, heat sources, and direct sun during operation unless the manufacturer says the unit is rated for those conditions. Do not open the battery case or connect bare wires. A power station does not replace a properly installed home backup system, and it should never be connected to household wiring through a wall outlet.
Check whether the station uses a lithium-ion or lithium iron phosphate battery, and review its storage and temperature guidance. Do not charge or operate it outside the stated temperature range.
Step-by-Step Instructions
Step 1: List the devices you need to run
Write down each device, its rated wattage, and how many hours you expect to use it. Find the wattage on the device label, its power adapter, or the manufacturer’s specifications. For devices labeled only in volts and amps, multiply volts by amps to estimate watts. Include charging losses by adding about 15-20% to your total energy estimate.
Estimate energy use by multiplying each device’s watts by its expected hours of use, then add the results. For example, a 10-watt light used for 5 hours needs about 50 watt-hours before losses. Devices that heat, cool, or use motors can consume much more energy than small electronics.
Tip: Some fridges, pumps, and tools draw extra power when they start. Check their surge or startup rating as well as their running wattage.
Check: You have a device list with estimated total watt-hours and the highest running and startup wattages.
Step 2: Match the station to your power needs
Choose a station whose battery capacity in watt-hours exceeds your estimated daily energy use, allowing extra capacity for conversion losses and changing conditions. Check that each device’s running wattage is below the station’s rated output for the outlet you plan to use. If a device has a startup surge, confirm that the station supports it for the duration stated by the manufacturer.
Check outlet type and voltage too. AC outlets suit devices with standard wall plugs; USB ports suit compatible phones and small electronics; DC ports may power some vehicle accessories. Avoid choosing by battery capacity alone: the station must also supply enough power at the right output.
Tip: A station rated for a high surge may support a brief startup load, but that does not mean it can run that load continuously.
Check: The station’s usable capacity and output ratings cover your planned devices, including any startup surge.
Step 3: Inspect and prepare the equipment
Read the station manual and inspect the case, ports, charging cable, and solar panel for damage. Place the station where it can stay dry and ventilated. Check that the battery has enough charge for setup, and learn how to read its display, select an output, and shut it down.
Before connecting a panel, compare its voltage and current range with the station’s solar input specifications. Use the manufacturer-approved cable or a cable specifically rated for the connection. Do not force connectors or use improvised adapters.
Tip: If any cable is frayed, a connector is bent, or the unit is swollen or leaking, stop using it and contact the manufacturer.
Check: The station and accessories are undamaged, and you can identify the correct ports and controls.
Step 4: Charge the battery before use
For the first charge, connect the included AC charger or another charging source approved by the manufacturer. Use a dry indoor outlet and keep the station ventilated. Check the display for the charging status and the manual for the expected charge range or time.
To charge with a solar panel, place the panel in open sunlight, connect it to the station’s solar input using the correct cable, and confirm that the display shows incoming solar power. Keep the station itself shaded and ventilated where practical. Panel output changes with clouds, angle, shade, season, and temperature, so allow extra time.
Tip: Do not exceed the station’s maximum solar input voltage or current. A panel’s open-circuit voltage can be higher than its voltage while producing power, so use the ratings specified by the manufacturer.
Check: The display shows that the battery is charging, and the battery reaches the charge level you planned to start with.
Step 5: Position the solar panel for steady sunlight
Place the panel on a stable surface with its face pointed toward the sun. Follow the panel manual for the recommended tilt; as a starting point, adjust it so sunlight falls as directly as possible on the panel. Move it as the sun shifts if practical, and keep shadows from trees, vehicles, tents, or people off the panel.
Secure the panel against wind and keep its cable away from walkways and vehicle tires. Do not place the panel where it could fall, overheat, or block the station’s vents.
Tip: Even a narrow shadow across part of a panel can reduce output. Check the station’s input display after changing the panel position.
Check: The panel is stable, receives direct sunlight, and the station registers solar input.
Step 6: Connect devices within the station’s limits
Turn on only the output you need, such as AC, USB, or DC. Connect one device at a time and check the station display for output power or an overload alert. Start with essential devices, then add others while keeping the combined load below the station’s rated limit.
Use the device’s original charger where possible. Unplug devices when they finish charging, and switch off unused outputs to reduce idle drain. Avoid using an inverter for devices that can charge directly through USB or DC if the manufacturer supports that connection.
Tip: If the display shows an overload or the station shuts off an output, disconnect devices before trying again. Do not repeatedly reset an overloaded station.
Check: Each device operates normally, the station shows no fault or overload, and the combined load stays within its rating.
Step 7: Monitor use and recharge as needed
Check the battery percentage and output load periodically, especially when powering a fridge, medical device, or other essential equipment. Compare the remaining capacity with the time left before you can recharge. Reduce nonessential loads if the battery is draining faster than expected.
Recharge from solar or another approved source when available. If the station will run unattended, follow its manual for monitoring, ventilation, and safe placement. Do not rely on a displayed runtime as an exact prediction; actual use changes with temperature, device cycling, and conversion losses.
Tip: For essential equipment, plan a backup power source or a safe way to reduce demand before the battery is nearly empty.
Check: The station remains within its operating limits, and its remaining charge supports your planned use until the next recharge.
Step 8: Store the station and panel safely
Turn off outputs and disconnect devices and charging cables. Clean the panel and station with the method allowed in their manuals, then dry them before storage. Store the equipment in a cool, dry place within the manufacturer’s temperature range.
Follow the manual’s recommended storage charge level and recharge schedule. Do not leave the battery fully depleted for extended storage, and inspect the cables and case before the next trip.
Tip: Storage guidance differs by battery chemistry and model. Use the station’s own instructions instead of assuming every battery should be stored at the same charge level.
Check: The equipment is dry, disconnected, undamaged, and stored at the recommended charge level and temperature.
Common Mistakes to Avoid
- Choosing a station based only on its watt-hour capacity. — Check continuous output, surge support, outlet type, and voltage against every planned device as well as battery capacity.
- Connecting a solar panel because its plug fits. — Verify voltage, current, and connector compatibility against the station’s solar input specifications before connecting.
- Expecting the panel’s advertised wattage all day. — Plan for lower real-world output from shade, clouds, angle, season, and heat; check the station display and retain a charge reserve.
- Leaving the station in rain or covering its vents. — Keep it dry and ventilated, and check the manual for weather and temperature limits.
Troubleshooting
Problem: The station does not show solar charging.
Solution: Check sunlight and panel shadows, reseat the cable, confirm it is connected to the solar input, and inspect input voltage compatibility. If the display still shows no input, test with the approved charger or contact the manufacturer.
Problem: The station shuts off when a device starts.
Solution: Disconnect the device and check its startup surge against the station’s surge rating. Reduce other connected loads or use a station rated for that device.
Problem: The battery drains faster than expected.
Solution: Check the display for total output, turn off unused ports, reduce device use, and account for AC conversion losses and equipment cycling. Recalculate the energy estimate using actual hours and wattage.
Problem: A device will not charge from a port.
Solution: Confirm the output is enabled, use a compatible cable, and check the device’s required voltage and power against that port’s rating. Try another supported port if available.
What Success Looks Like
Your setup is working when the station charges from an approved source, powers each intended device without overload warnings or unexpected shutdowns, and retains enough battery for the planned duration. The station and panel should remain dry, ventilated, and within their rated temperature and electrical limits.
Next Steps
Record the actual power use and solar charging rate for your setup. Use those figures to refine the capacity and panel size you need on the next trip. Recharge and store the station according to its manual, and inspect it before each use. If a device is essential for health or safety, arrange a suitable backup source and follow the device maker’s power guidance.
Frequently Asked Questions
Can I use any solar panel with a portable power station?
No. Check the station’s allowed solar input voltage, current, and connector. A compatible connector alone does not confirm electrical compatibility.
How long will a power station run my device?
Estimate runtime by dividing the station’s usable watt-hours by the device’s average wattage, then allow for conversion losses and changes in device demand. Actual runtime can be shorter, especially for AC devices, fridges, and equipment with motors.
Can a portable power station run a refrigerator?
It may, if the station supports the refrigerator’s startup surge and running load and has enough capacity for the intended hours. Check the fridge’s actual energy use over time, since its compressor cycles on and off.
Can I charge the station and power devices at the same time?
Some models support pass-through charging, while others limit or disallow it. Check the manual for the specific charging source, output, and operating conditions before using this feature.
Can I leave a power station outside while charging?
Only if the manufacturer permits the conditions. Keep the station dry and within its temperature range; many panels can be outdoors while the station stays in a protected, ventilated location.