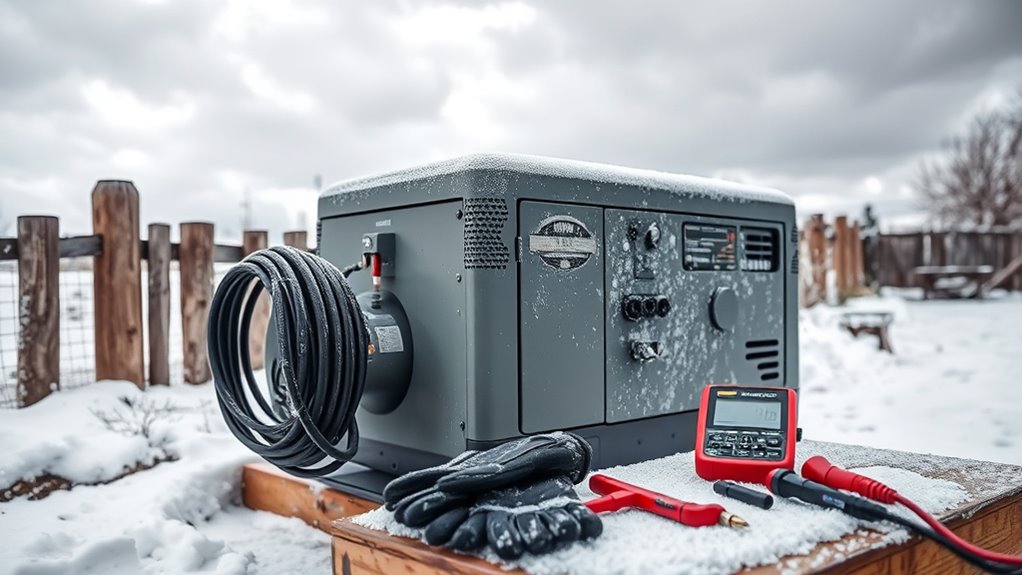

To winterize your standby generator in just 15 minutes, start by checking and changing the oil, and inspecting the air filter for dirt or damage. Then, tighten electrical connections and verify your battery’s condition, replacing it if needed. Test the transfer switch and conduct a quick run to ensure everything functions correctly. Finally, inspect the exhaust system, secure fuel with stabilizer, and prepare an emergency kit—more tips await to facilitate your winter prep.
Key Takeaways
- Perform quick oil and air filter checks, replacing or cleaning to ensure optimal engine performance.
- Inspect and tighten electrical connections and test the battery for reliable startup.
- Conduct a short generator run to verify operation, listen for unusual noises, and check exhaust flow.
- Store fuel with stabilizer in approved containers, and inspect the exhaust system for blockages.
- Organize an emergency kit and maintain a maintenance log for efficient winter readiness.
Check and Change the Oil
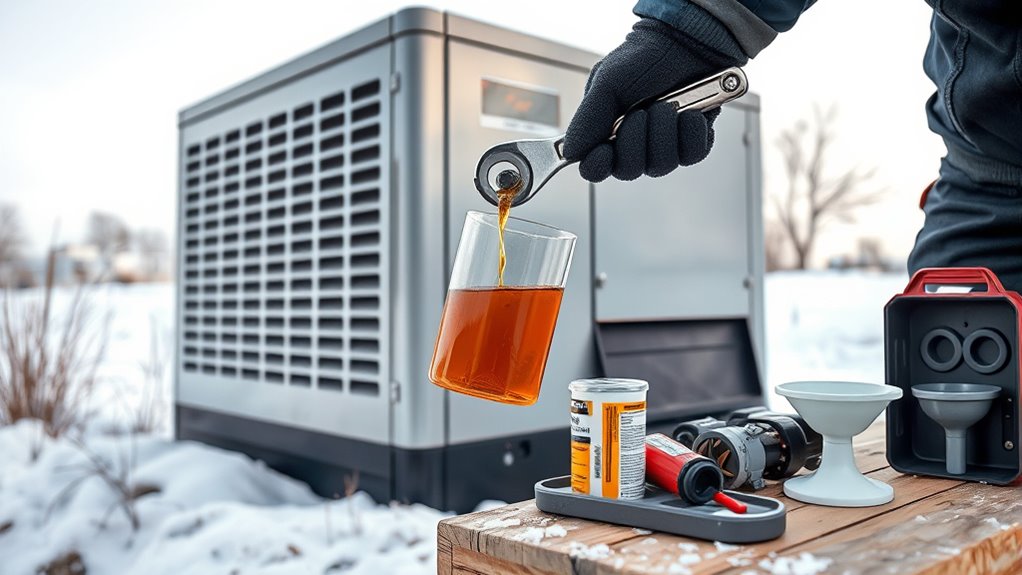
Before winterizing your standby generator, you should check and change the oil to guarantee it runs smoothly during colder months. Start with an oil check to determine if the current oil level is sufficient and if the oil appears clean. If it’s dark, dirty, or low, it’s time for an oil change. Drain the old oil completely and replace it with fresh, manufacturer-recommended oil to ensure proper lubrication. This step helps prevent engine wear and keeps your generator ready for use during winter emergencies. Always follow your generator’s manual for the correct oil type and change intervals. Performing a thorough oil check and change now can save you from unexpected breakdowns when you need your generator most. Regular maintenance like Kia Tuning can also improve overall engine health and performance.
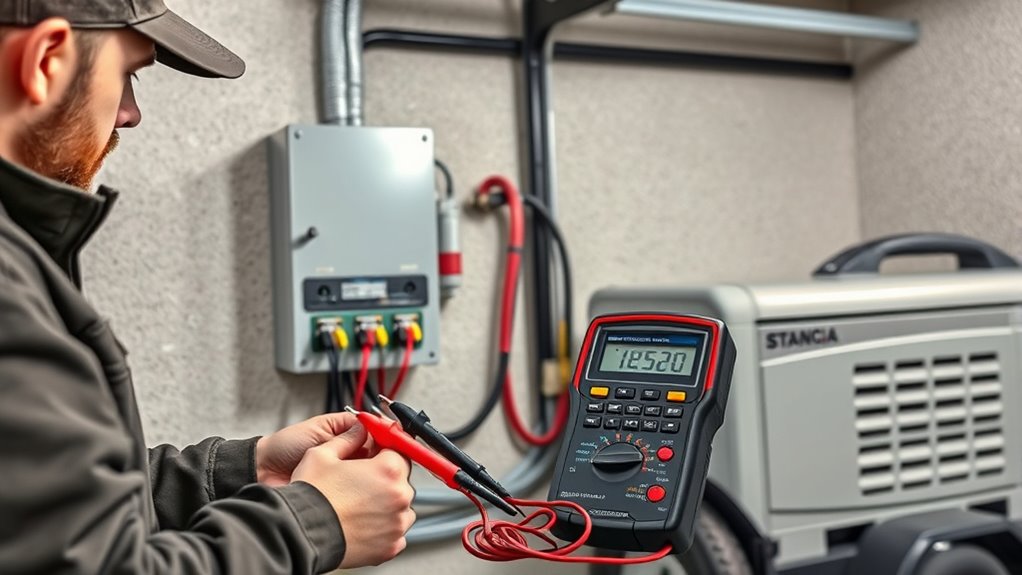
Inspect and Tighten Electrical Connections
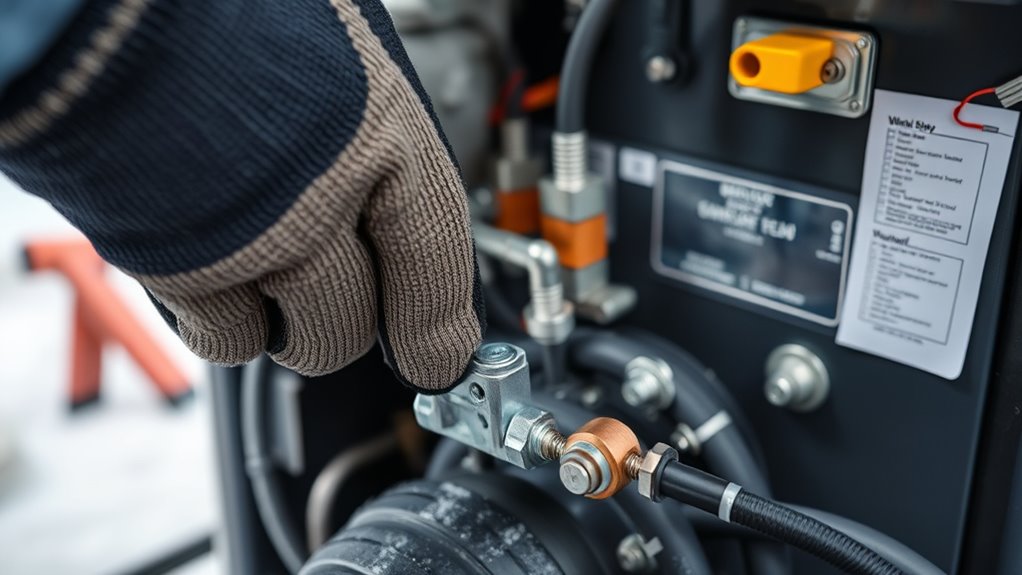
Since electrical connections can loosen over time, it’s crucial to inspect them thoroughly during winterizing. Loose or corroded connections can compromise electrical safety and reduce your generator’s reliability. Turn off the generator and disconnect the power before inspecting. Check all terminals, wires, and connectors for signs of corrosion, wear, or looseness. Tighten any loose connections with a wrench, ensuring they’re secure without over-tightening, which could damage components. Clean any corrosion with a wire brush or electrical contact cleaner. Maintaining connection integrity prevents potential electrical hazards and ensures the generator operates smoothly during winter emergencies. Regular inspection and proper tightening are quick yet essential steps to keep your standby generator safe and fully functional year-round. Additionally, understanding electrical safety best practices can help prevent accidents and prolong the lifespan of your equipment.
Verify the Battery’s Condition and Charge
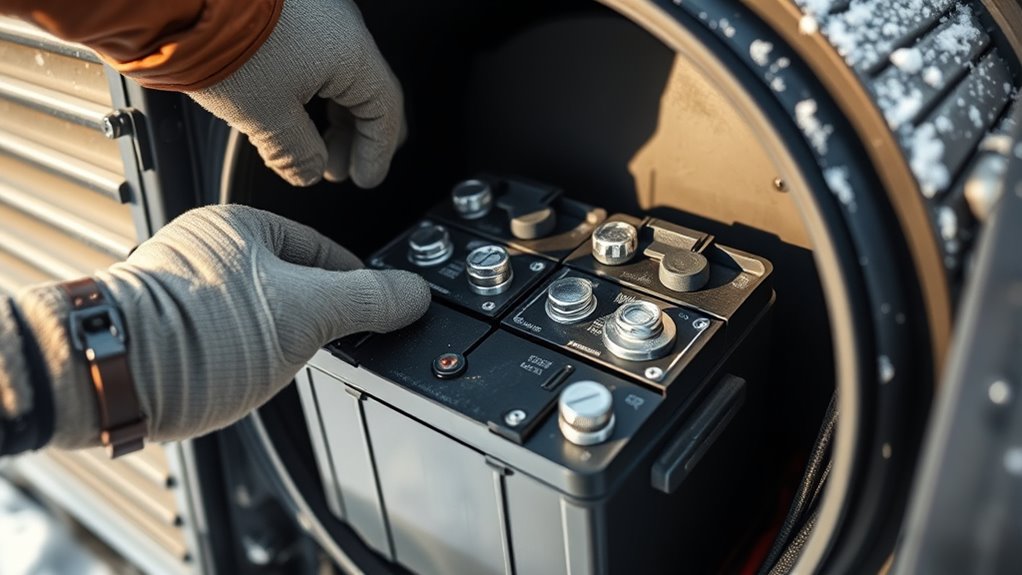
After tightening and cleaning electrical connections, it’s time to check the battery’s condition. Start with a quick battery health assessment and perform a voltage check to verify it’s holding a proper charge. A healthy battery prevents starting issues during winter storms.
Consider these steps:
- Inspect for corrosion or buildup on terminals
- Use a multimeter to measure voltage; ideally above 12.6 volts
- Look for any swelling or leaks in the battery case
- Check the battery’s age and replace if over three years
- Confirm the battery is securely mounted and connections are tight
- Regular maintenance and battery diagnostics can help catch potential issues early
Maintaining a good battery health and confirming the voltage check helps ensure your generator will start reliably when needed most.
Test the Transfer Switch Functionality
Start by visually inspecting your transfer switch for any signs of damage or corrosion. Then, perform a manual transfer test to make certain it switches smoothly between power sources. Finally, verify that the power transfer occurs correctly and that your generator kicks in when needed.
Visual Inspection of Switch
A visual inspection of the transfer switch is a critical step to guarantee your standby generator operates correctly when needed. During this check, look for signs of wear, corrosion, or loose connections that could affect switch maintenance. Confirm the switch is clean, dry, and free of debris, which helps maintain panel safety. Verify that all wiring appears intact and securely connected. Check for any signs of rust or damage around the switch components. Look for corrosion on terminals and verify there are no exposed wires. Test the switch’s physical movement to ensure it operates smoothly. Regular visual inspections help prevent failure during emergencies and keep the system in top shape, ensuring reliable power when you need it most. Additionally, inspecting transfer switch functionality regularly can help identify issues early and prevent costly repairs.
Perform Manual Transfer Test
Performing a manual transfer test is essential to guarantee your standby generator’s transfer switch functions properly in an outage. First, ensure you follow all safety procedures, such as wearing protective gear and disabling the generator before starting. Locate the transfer switch and manually trigger the transfer process, observing how it switches from utility power to generator power. Confirm that the switch operates smoothly and that the generator powers your home or business correctly. This test helps identify potential issues before an emergency, preventing surprises during a blackout. Remember, never attempt a manual transfer test without adhering to safety procedures, as it involves handling live electrical components. Conducting this test regularly guarantees your transfer switch’s reliability, giving you peace of mind when you need your generator most. Proper testing procedures are crucial to ensure your system’s safety and effectiveness.
Verify Power Transfer
Verifying the power transfer confirms that your transfer switch operates correctly during an outage. To guarantee smooth power delivery, test the switch by switching from utility power to your generator. Watch for a momentary power surge and make sure the generator kicks in seamlessly. Confirm that the load is balanced across circuits to prevent overloads. During testing, listen for unusual noises or delays, which could indicate issues. Once the transfer completes, check connected appliances and systems for proper operation. This step helps catch problems before an emergency. Additionally, reviewing outdoor electrical safety guidelines ensures all connections are secure and compliant with local codes.
- Ensure the generator starts smoothly without hesitation
- Observe for any power surges during transfer
- Confirm load distribution remains balanced
- Listen for unusual sounds indicating switch issues
- Verify all critical systems operate correctly
Clean or Replace the Air Filter

Check your air filter to see if it’s dirty or clogged; a clean filter guarantees ideal airflow. If it’s grimy or has debris, replace it following the manufacturer’s tips for easy installation. Regular inspection and timely replacement keep your generator running smoothly during winter. For enhanced performance, consider upgrading your air intake system to improve airflow efficiency.
Air Filter Inspection
Ensuring your standby generator runs smoothly this winter starts with inspecting its air filter. A clean air filter allows proper airflow, preventing strain on the engine and ensuring reliable operation during outages. During your inspection, look for dirt, dust, or debris buildup that can impede performance. If the filter appears clogged or damaged, it’s time for a replacement. Regular air filter maintenance helps prolong your generator’s lifespan and optimize efficiency. Consider filter upgrade options if your environment is particularly dusty or dirty, to improve filtration and airflow. Keep in mind that a simple inspection can save you from costly repairs later. Here are key points to focus on during your check:
- Check for visible dirt or debris
- Confirm the filter fits securely
- Look for signs of damage or tears
- Assess airflow resistance
- Decide if a filter upgrade is needed
- Proper filter maintenance is essential for ensuring optimal generator performance during winter months.
Filter Replacement Tips
If your inspection reveals a dirty or damaged air filter, it’s time to replace it to keep your generator running efficiently. Regular air filter maintenance ensures ideal airflow and prevents debris from damaging internal components. Follow these filter replacement tips: always have a compatible replacement on hand, turn off the generator before replacing, and gently clean surrounding areas. Keep in mind that a clogged filter reduces efficiency and can cause overheating. Use the table below for quick reference:
| Step | Action | Tips |
|---|---|---|
| Remove the filter | Carefully take out the old filter | Avoid forcing to prevent damage |
| Inspect the filter | Check for excessive dirt or damage | Replace if severely dirty/damaged |
| Install the new | Place the new filter correctly | Ensure it fits snugly |
| Test the generator | Run briefly to confirm proper airflow | Listen for unusual noises |
Additionally, inspecting your Soul Sanctuaries can provide insights into holistic wellness practices that support overall maintenance and well-being. Adopt these simple tips for effective air filter maintenance.
Ensure Proper Fuel Storage and Add Stabilizer
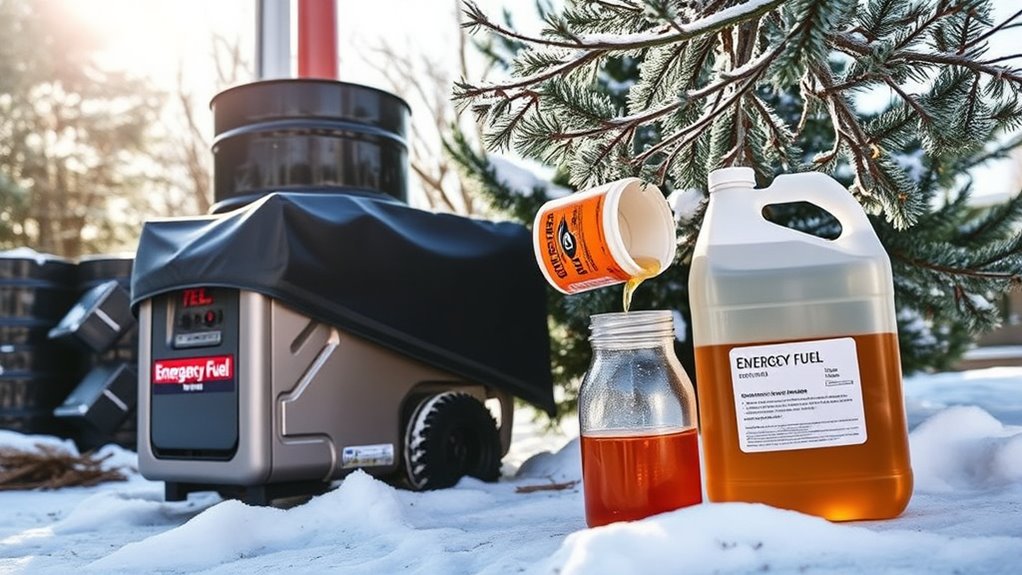
Proper fuel storage is essential to keep your standby generator ready for use when needed. To maintain fuel stability and ensure storage safety, use approved containers and keep fuel in a cool, dry place away from ignition sources. Always label containers clearly to prevent mix-ups. Add a fuel stabilizer to prevent degradation, especially if stored for extended periods. Regularly check fuel levels and look for leaks or corrosion. Keep fuel away from children and pets to avoid accidents. Use these tips to extend fuel shelf life and keep your generator reliable during emergencies:
- Store fuel in approved, sealed containers
- Keep fuel in a well-ventilated, cool location
- Add stabilizer at the start of storage
- Rotate fuel periodically to prevent stale fuel
- Never store near heat sources or flames
- Understanding fuel stability is crucial for safe and effective storage.
Inspect the Exhaust System for Blockages
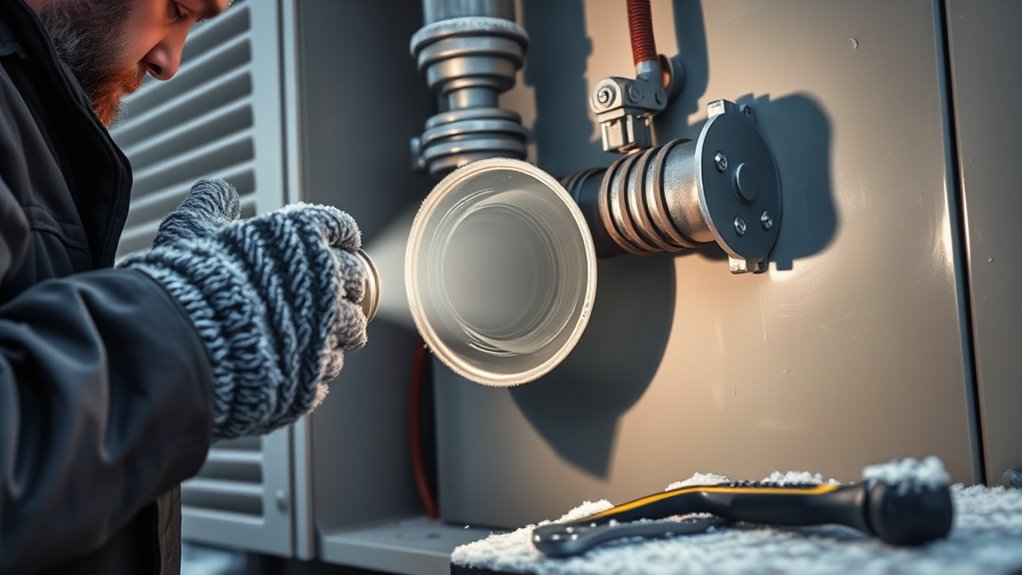
Before running your generator, take a moment to inspect the exhaust system for blockages, as obstructions can cause dangerous fumes to build up or reduce performance. Look for signs of exhaust blockage, such as rust, debris, or bird nests in the exhaust pipe. Perform a chimney inspection if your generator has a chimney vent, ensuring it’s clear and free of obstructions. Blockages can lead to exhaust gases like carbon monoxide leaking into your home, creating a serious safety hazard. Use a flashlight to check the entire length of the exhaust system, including the outlet and vents, removing any debris or obstructions you find. Regular inspection helps maintain proper airflow, ensuring your generator runs safely and efficiently during winter needs.
Conduct a Quick Run Test and Monitor Performance
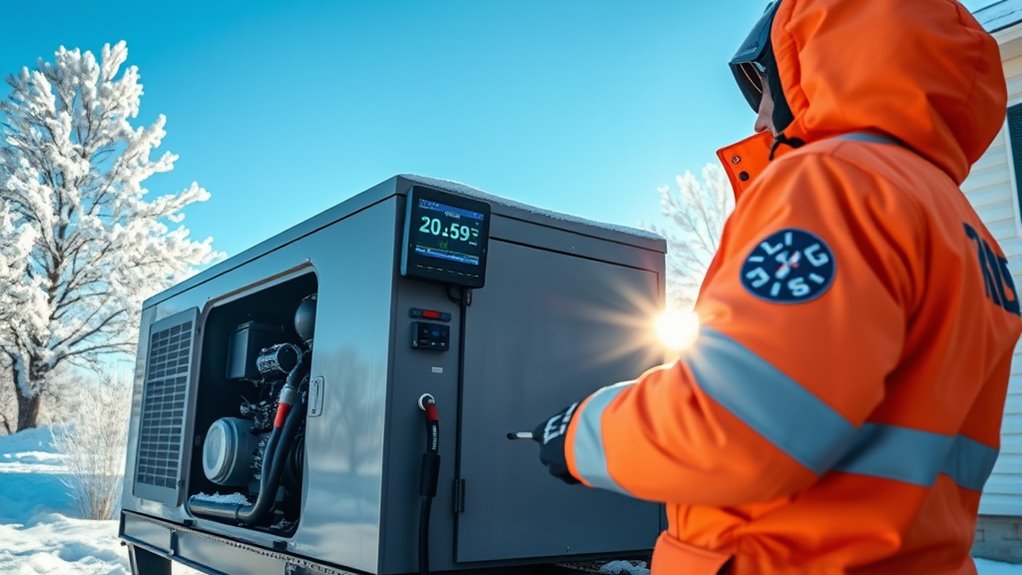
Starting your generator for a quick run test allows you to verify that it’s functioning correctly before the harsh winter weather hits. During the test, carefully observe its operation to guarantee ideal performance and identify any issues early. Focus on performance monitoring and system diagnostics to catch potential problems.
Running a quick test verifies your generator’s performance before winter arrives.
Consider these key steps:
- Listen for unusual noises or vibrations
- Check exhaust emissions for proper flow
- Monitor oil and coolant levels throughout the run
- Confirm that the generator reaches the correct operating temperature
- Review system diagnostics for error codes or alerts
This quick test helps confirm the generator’s readiness, ensuring reliable power when you need it most. Regular testing and monitoring can prevent unexpected failures during winter emergencies.
Prepare a Winter Emergency Kit and Maintenance Log

To guarantee you’re prepared for winter outages, assembling a thorough emergency kit and maintaining a detailed maintenance log are essential steps. Your emergency kit should include winter clothing, flashlights, batteries, bottled water, non-perishable food, and a first aid kit. Also, list emergency contacts like local utility providers and emergency services. Keep this kit accessible and regularly check its contents. A maintenance log helps track generator inspections, oil changes, and battery checks, ensuring your standby generator operates reliably. Use the table below to organize your info:
| Emergency Contacts | Maintenance Tasks |
|---|---|
| Utility Company | Oil Change Date |
| Local Emergency | Battery Inspection |
| Provider | Fuel Level Check |
| Nearby Shelter | Filter Replacement |
| Neighbor | System Test Date |
Staying organized guarantees you’re ready when winter power issues strike.
Frequently Asked Questions
How Often Should I Schedule Professional Winter Maintenance for My Generator?
You should schedule a professional inspection at least once a year for your generator’s maintenance schedule. If you experience harsh winters or heavy usage, consider more frequent check-ups, like every six months. Regular professional maintenance guarantees your generator runs smoothly during outages. Don’t wait until problems arise—stay proactive with timely inspections to keep your backup power reliable all winter long.
What Signs Indicate My Generator Needs Urgent Repairs Before Winter?
Noticing strange noises, persistent starting issues, or visible leaks? These signs indicate your generator needs urgent repairs before winter. Don’t ignore generator troubleshooting clues or skip your maintenance checklist—delaying could leave you vulnerable during a power outage. Are you prepared to handle a winter emergency? Address issues promptly to ensure your standby generator runs smoothly when you need it most. Regular inspections help catch problems early and keep your system dependable.
Can I Winterize My Generator Myself or Should I Hire a Professional?
You can winterize your generator yourself if you’re comfortable with basic DIY tasks, but for maximum safety and thoroughness, professional services are recommended. DIY considerations include checking antifreeze levels and inspecting for leaks, but a professional can ensure all components are properly winterized, reducing the risk of damage. If you’re unsure or lack experience, hiring a professional guarantees your generator stays reliable during winter storms.
What Safety Precautions Should I Take During Winterizing Procedures?
You should always wear personal protective equipment, like gloves and eye protection, to stay safe during winterizing. Make certain electrical safety by disconnecting the generator from power sources before working on it. Keep your workspace dry and clear of clutter to prevent slips or accidents. Follow all manufacturer instructions carefully, and if you’re unsure, consider hiring a professional to avoid hazards. Safety always comes first when winterizing your generator.
How Do Environmental Factors Like Snow or Ice Impact Generator Performance?
Snow and ice can hinder your generator’s performance by blocking airflow and adding weight that strains components. Cold temperatures reduce solar efficiency, limiting solar-powered backup options, while wind impact can cause debris buildup or damage. To maintain ideal function, clear snow and ice regularly, guarantee proper ventilation, and secure your generator against wind. These steps help keep your system reliable during harsh winter conditions, ensuring you stay powered when you need it most.
Conclusion
With these simple steps, you’re giving your generator a gentle winter hug, ensuring it stays cozy and ready for any cold surprises. A little prep now means fewer surprises later, keeping your home warm and worry-free. Think of it as giving your backup power a friendly nudge to stay healthy and happy all season long. Stay proactive, and your generator will be your reliable winter companion whenever you need it most.